You’ve purchased your dream wood-burning fireplace, but how do you ensure you’re burning safely? Well at Acucraft, your fireplace safety is important to us! That’s why we build the safest fireplaces on the market. We’ve been designing and engineering wood burning fireplaces for over 40 years and have learned a lot about wood burning efficiency and performance. Here’s some of what we’ve learned…
A common misconception is that you have to have a roaring fire in order to feel any heat from your fireplace; understanding the four stages of fire help ensure you’re building the most efficient, heat-producing, safe fire in your wood burning fireplace.
The Four Stages of a Fire:
- The Start Up Stage—Warming up the Flue
- The Creosote Stage—Moisture Evaporation
- The Heating Stage—Moisture Evaporation
- The Die Down Stage—Damper Down and Enjoy the Heat
Stage 1: Start Up Stage—Warming up the Flue
Lets start with the “Start Up Stage.” This stage involves warming your fireplace flue with the proper settings and using a quality firestarter.
Open your combustion air and damper controls to draw combustion air into your firebox. More combustion air is needed to start your fire.
You’ll need to warm up your flue to prevent creosote build up. Start your fire using dry kindling and/or a quality firestarter such as a wax and sawdust firestarter or small, dry sticks and twigs. Another very common misconception is the use of newspaper as kindling to warm your flue; many chimney sweeps will tell you that burning newspaper to heat up a cold flue, or starting a fire without warming the flue first are top reasons for creosote build up. Over time creosote build up can lead to a chimney fire, which can cause severe damage to your home.
Stage 2: Creosote Stage—Moisture Evaporation
Next up is the “Creosote Stage.” Once the flue is warm, you can then add dry, seasoned wood to the kindling fire. Burning dry wood will maximize your heat output, produce less creosote, and keep your glass clean through our air-wash system.
Make sure the wood you are burning is cut and split to less than six-inches in diameter, and stored in a dry location until the moisture content is less than 20%. The best way to know the moisture content of the wood is to measure it with a wood moisture meter.
Once your fire is lit, the air should freely flow up and out of the flue system.
During the creosote stage the wood will hiss, bubble and crack on the ends as the moisture evaporates and the temperature increases.
Stage 3: Heating Stage—Damper Down and Enjoy the Heat
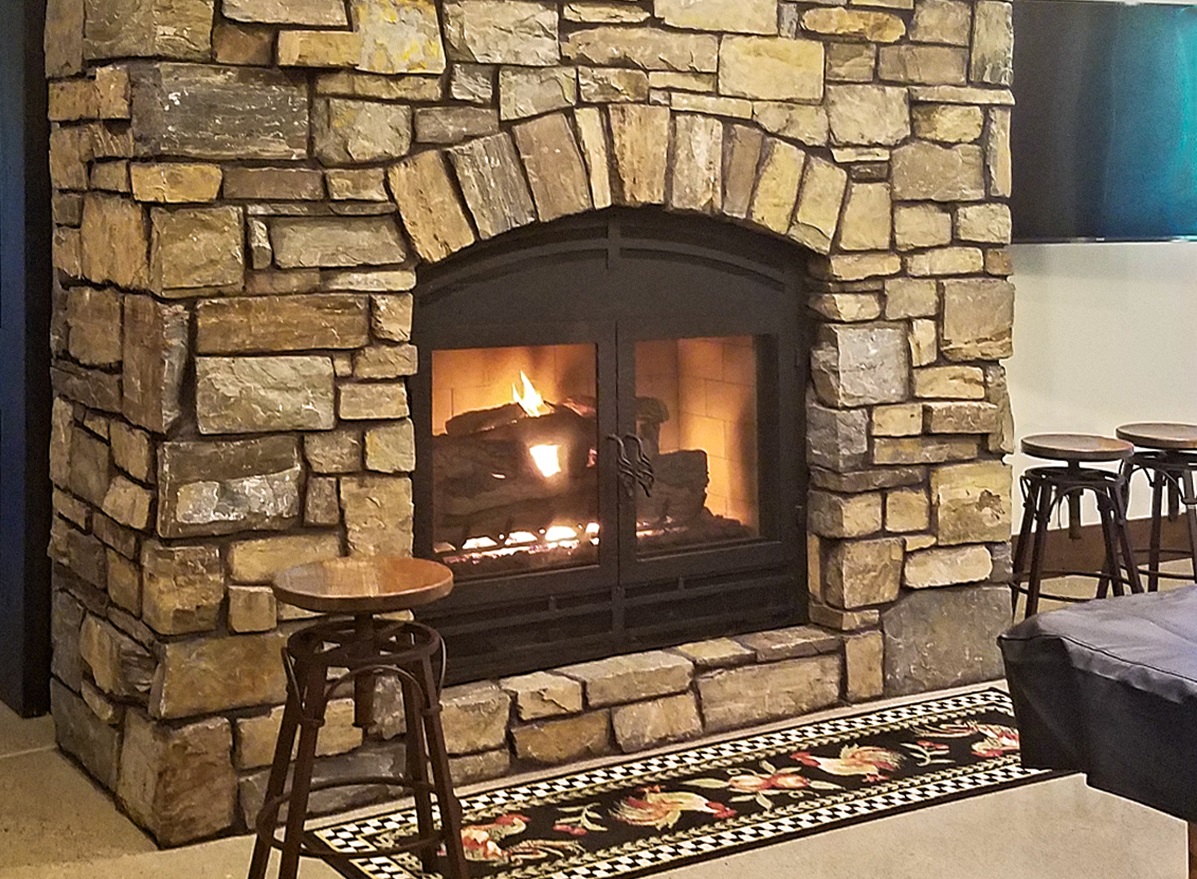
Now onto the “Heating Stage.” Once the moisture has burned out of the wood and the wood burns clean without grey smoke, reduce the air coming into the firebox by dampering down the combustion controls. By doing so, the flames will take on a slow moving orange color.
Maintain this type of burn for maximum heat and minimal creosote build up on your glass and in your flue. The heating stage, on average, can be maintained for 6-10 hours between loads of new wood, depending on your wood and your fireplace.
 |
| Perfect Looking Flame |
Stage 4: Die Down Stage—Keep the Flue Warm While the Fire Goes Out
And finally, the “Die Down Stage.” If you let your fire go out with the controls dampered down, your flue will begin to get cold at the top, and creosote can build up when the cold meets with slow moving smoke. Instead, during the die down stage, open your damper controls to keep the flue warm until the fire goes out. This will help reduce creosote build up, keeping your fireplace and home safe!
Learn more about efficient Acucraft wood burning fireplaces»
Happy Burning!